Wednesday, June 12, 2019

Deviled Eggs

I absolutely love deviled eggs, but I’m not a fan of mayonnaise.  When I can, I try to make these with homemade aoili. The fresh garlic and lemon in the aioli gives it a more nuanced flavor, but you end up with a lot of leftover aoili if you make it just for this dish.

Ingredients:

18 hard boiled eggs
4 tbsp mayo
1 large avocado (needs to be really ripe and creamy), mashed
1 tbsp fresh ground pepper (fresh pepper is more potent. Use a little more if it’s pre-ground)
2 tbsp brown mustard (use less or Dijon if you want less of a tang)
1 tbsp garlic powder (OK to add more if you really like garlic, or omit if you don’t)
1 tsp coarse salt
Optional:
1 tsp sesame oil
1 tsp truffle oil
paprika
Directions:
Note: The yolks’ dryness will depend on how cooked your eggs are.
My method for cooking the eggs (so the whites are tender and not rubbery):
-Place eggs from the fridge in sauce pan completely submerged in cool water. Add about 2-3 tbsp of salt to the water.
-Place over high heat, until the water reaches a boiling point.
-Turn off heat and cover. Let sit for 25 min. (if using room temp eggs, let sit for 12 – 15 min)
-transfer eggs to a colander and run under cool water to stop the cooking.
1. Peel eggs, cut in half, and separate the yolks from the whites.
2. break up the yolks
3. In a medium bowl, mix the salt, spices, oil, mustard, and mayo.
4. mix in the egg yolks. If it’s a little dry, add more mayo or mashed avocado
5. Fill the egg whites with the egg yolk mixture
6. sprinkle with the paprika for color
Tip: use a piping bag to quickly fill the eggs.

Wednesday, May 3, 2017

Steamed Chicken Rice bowls (Skinny lo mai gai)

Lo Mai Gai is one of my favorite dim sum selections. It's savory, packed with umami, and the texture is rich and decadent with the soft and silky sticky rice. Here's an equally yummy and satisfying, but healthier take on it.

Serves 4 at 526 cal per serving. 58g carbs/15g fat/46g protein


Ingredients: 


1.5 c brown rice (raw, soaked for at least 20 min)
1.5 lb chicken breast, thinly sliced
2 oz dried shitaki mushrooms (should be a little over 2 cups, before soaking) 
1/8 c Shaoxing wine (dark prefered)
1 tsp XO Sauce
3 tbls superior dark soy sauce
1 tbls oyster sauce
2 tbls sesame oil
Scallions (optional) 

Directions: 

1. Rinse, then soak mushrooms in a 3 to 4 cup container. The mushrooms will take about an hour to soak, so it's best to do this overnight. Once they are rehydrated and soft, remove from liquid (reserve the liquid). Remove the stems and slice the mushrooms into strips. 

2. Rinse and soak the brown rice with a mixture of the reserved mushroom water and water, preserving the rice: liquid ratio that's recommended*.

3. Combine the wine, soy sauce, oyster sauce, oil, and XO sauce in a bowl. Place sliced chicken in the marinade leave covered for at least 30 min. (The longer you leave the marinade on the chicken the more flavorful it'll be). 

4. Once the rice has soaked, start the rice cooker (or place soaked rice and liquid in pot over high heat, reducing to a simmer once it's boiling). Meanwhile, in a large pan, brown the chicken and mushrooms (3 - 5 min), then remove from heat. Once the rice has reached a boil and simmered for about 2 min (liquid reduced to the same level as the rice and bubbly), add the chicken mushroom mixture and any remaining marinade to the rice pot. Cover and simmer until done (about10 - 15 min). 

5. Serve in a bowl, scooping some of the rice from the bottom first, then topping it with the chicken and mushrooms. Add steamed veggies of your choice and garnish w/ scallions. 

Optional: Mix the chicken and mushrooms which are on top with the rice, then serve. 

Notes: 
* I use a very Chinese eye-balling method that isn't always accurate. I also use a very forgiving rice cooker. Generally, rice is pretty forgiving if you're using a rice cooker. If you add a smidge too much water, the rice is softer and/or fluffier. If it's WAY too much water, you have porridge. If you use a little less water, or didn't pre-soak it for long enough, the rice will be chewier in texture. Also, cooking times will vary between stove top and rice cooker. 

**If you are watching your carbs, omit the rice or use riced cauliflower. Make a little extra marinade to season the cauliflower or any other extra veggies. 


Tuesday, June 28, 2016

Ginger Scallion Rockfish

This isn't the first ginger scallion fish recipe I've posted, and it won't be the last. Steaming the fish, or cooking en papillote (which essentially steams the fish within a pouch), gives you something super moist, tender, and flavorful.  The ginger cuts out the "fishy" aroma that some people don't like so that even a picky normally non-fish person would eat it again.

(For the en papillote directions, see my recipe for Ginger Scallion Salmon.)

Served with jasmine rice over riced broccoli and cauliflower. Collard greens with Chinese Bacon on the side.


Serves 2

Ingredients

1/2 lb of Rockfish fillet
ginger, sliced (about 3 slices per fillet)
2 stalks of scallion (finely chop the green portion, set aside. Slice lengthwise the whites).
3 tbsp soy sauce
2 tbsp oyster sauce
4 tbsp oil (olive, canola, any cooking oil)
1 tbsp sesame oil
1 tbsp grated ginger (if you want a milder ginger flavor, just cut this strips instead)

Directions

  1. Preheat oven to 325°
  2. Line an 8" square pan with foil. Apply a thin layer of sesame oil to the bottom. 
  3. Take fillets out of the packaging and blot dry. Place in the pan, side by side. 
  4. place three slices of the ginger and scallion whties on each fillet. 
  5. Drizzle each fillet with about 1/2 tsp of soy sauce
  6. Cover pan tightly with another piece of foil, then place in oven 15 - 20 min. Fish is done when flesh easily flakes apart and is opaque. 
  7. While the fish is cooking, place grated ginger, scallion greens, soy sauce and oyster sauce in a small heat-safe bowl. 
  8. Heat the oils together in a small pan. When it gets to the smoking point, pour the hot oil into the small bowl w/ the other sauce ingredients. 
  9. Plate the fish and spoon the sauce over it right when you're about to serve. 


Collard Greens with Chinese Bacon

Collard greens, like kale, needs a little extra TLC. The raw leaves are tough and the stalks are even tougher. However, it's not unlike other forms of greens that require you to cook it so before it becomes edible. The key ingredient in this recipe is the Chinese bacon.

Seves 2

Ingredients

4 cups of collard greens
1/2 a small white onion (about 1/2 cup) diced
2 clove garlic 
1/4 cup diced or thinly sliced Chinese bacon (about a 5 or 6 inch portion)
1/2 tsp sesame oil
1/2 tsp olive oil
3- 4 oz of water

Directions

  1. Wash and dry the greens thoroughly. 
  2. Remove the tough stalk and "spine" from the leaves, then cut the leaves into 1 - 2 inch pieces. 
  3. Heat the oil in a large pan, add garlic. 
  4. Once garlic is starting to turn a light golden color, add onions. Move the contents of the pan around to keep pieces from burning. 
  5. Once onions are starting to caramelize (about 5 - 7 mins), add the Chinese bacon to the pan and about 2 oz of water. The bacon with soften and render while the onions continue to caramelize. Move contents around every couple of minutes for about 5 min. 
  6. Add the greens to the pan and another 1- 2 oz of water. Stir contents then cover for about 5 min. The greens will wilt down. 
  7. Remove lid and toss contents around the pan. Let the liquid cook down. The greens should be a dark, vibrant green. 
  8. Transfer to plates and serve. 

This was delicious with some Ginger Scallion Rockfish and rice. 

Saturday, June 25, 2016

Salted Eggs (Chinese Preserved Eggs)

Recently, I've been thinking a lot about the stuff my mom used to make when I was a kid. Because of the myriad of foods I was introduced to as a kid, I grew up experiencing flavors and foods that I took for granted as much as American kids take PB&J for granted. One such item is the salted (preserved) egg. The luscious, golden yolk was the coveted prize and can be found within many Asian dishes - Lotus leaf wrapped sticky rice, glutinous rice and chicken, bamboo leaf wrapped sticky rice dumplings, moon cakes, silken (steamed) eggs, clay pot rice - just to name a few.

However, it's been a fairly elusive ingredient to obtain. If you're lucky enough to live close to an asian market, you'll have to shell out about twice as much as a regular egg for the preserved egg. So, I decided to make my own following my mom's instructions. :D

My first attempt came out better than I'd hoped and I'll soon use them to make some of my childhood favorites.


Ingredients: 

2 to 4 oz of strong alcohol (I used whiskey).
1/2 c kosher salt.
6 Large chicken eggs


Directions: 

Rinse and dry the eggs
Dip egg in the alcohol
Coat egg with salt
Wrap egg w/ plastic wrap
Add a few drops of the whiskey and more salt before closing up the plastic wrap
Repeat for all eggs
Place wrapped eggs back into the bottom half of the egg carton
Place carton of eggs in a ziplock baggie big enough to hold the carton
Leave for 20-30 days on the counter.
Remove from wrap and rinse salt off.
You can crack one open at day 20 to check.

They are done when the yolk holds its perfectly spherical shape and is a deep orange color, and the whites would be fairly watery.

Sunday, May 22, 2016

Pulled Pork

I made pulled pork for a party a few months ago and I was blown away with how easy it was. The key is in the slow cooker. Through a couple of tries, I found that my 6 qt oval can easily take on a 6 lb shoulder/butt.. and could kinda squeeze in a little over 8 lbs.  

It was really popular at parties and it was an easy entree for a large family dinner. We toasted up some Hawaiian buns (use the dinner rolls if you want sliders) and topped it with my favorite BBQ sauce.

Roasted veggies and a baked potato rounded out the meal.


Ingredients: 

1 c brown sugar
1 tbsp ground cumin
1 tbsp chili powder
1/2 tbsp ground sage
1/2 tbsp ground thyme
1 tbsp coarse salt
5 cloves garlic, finely minced
1 medium onion, sliced
16 oz chicken stock

Directions: 

  1. Remove pork from package. Blot dry with paper towels. 
  2. In a medium mixing bowl, combine spices, sugar, and garlic. This is your dry-rub.
  3. Rub the dry rub all over the pork. (optional: do this step the night before and let sit in the refrigerator in a covered container).
  4. In the slow cooker, spread the sliced onion out in an even layer. 
  5. Place pork into slow cooker, fatty side up. 
  6. Pour chicken stock into the slow cooker so that the pork is 80% - 90% covered (you don't need to use all of the cooking liquid). 
  7. Cover. Cook on high for 6 hours or low for 9. (Do not uncover the slow cooker until at least 6 hrs have passed). 
  8. After cooking time has lapsed, pull out the pork shoulder with some tongs and place in a shallow container.
  9. Transfer the cooking liquid into a separate container. As it cools, skim off some of the fat. 
  10. With two forks, shred the meat. The meat should easily come apart - fall off the bone tender. 
  11. Place meat back into the slow cooker with some of the cooking liquid to keep it moist. Reserve the rest of the liquid so people can use it as desired (like an aus ju). Set slow cooker to "warm."

Thursday, September 10, 2015

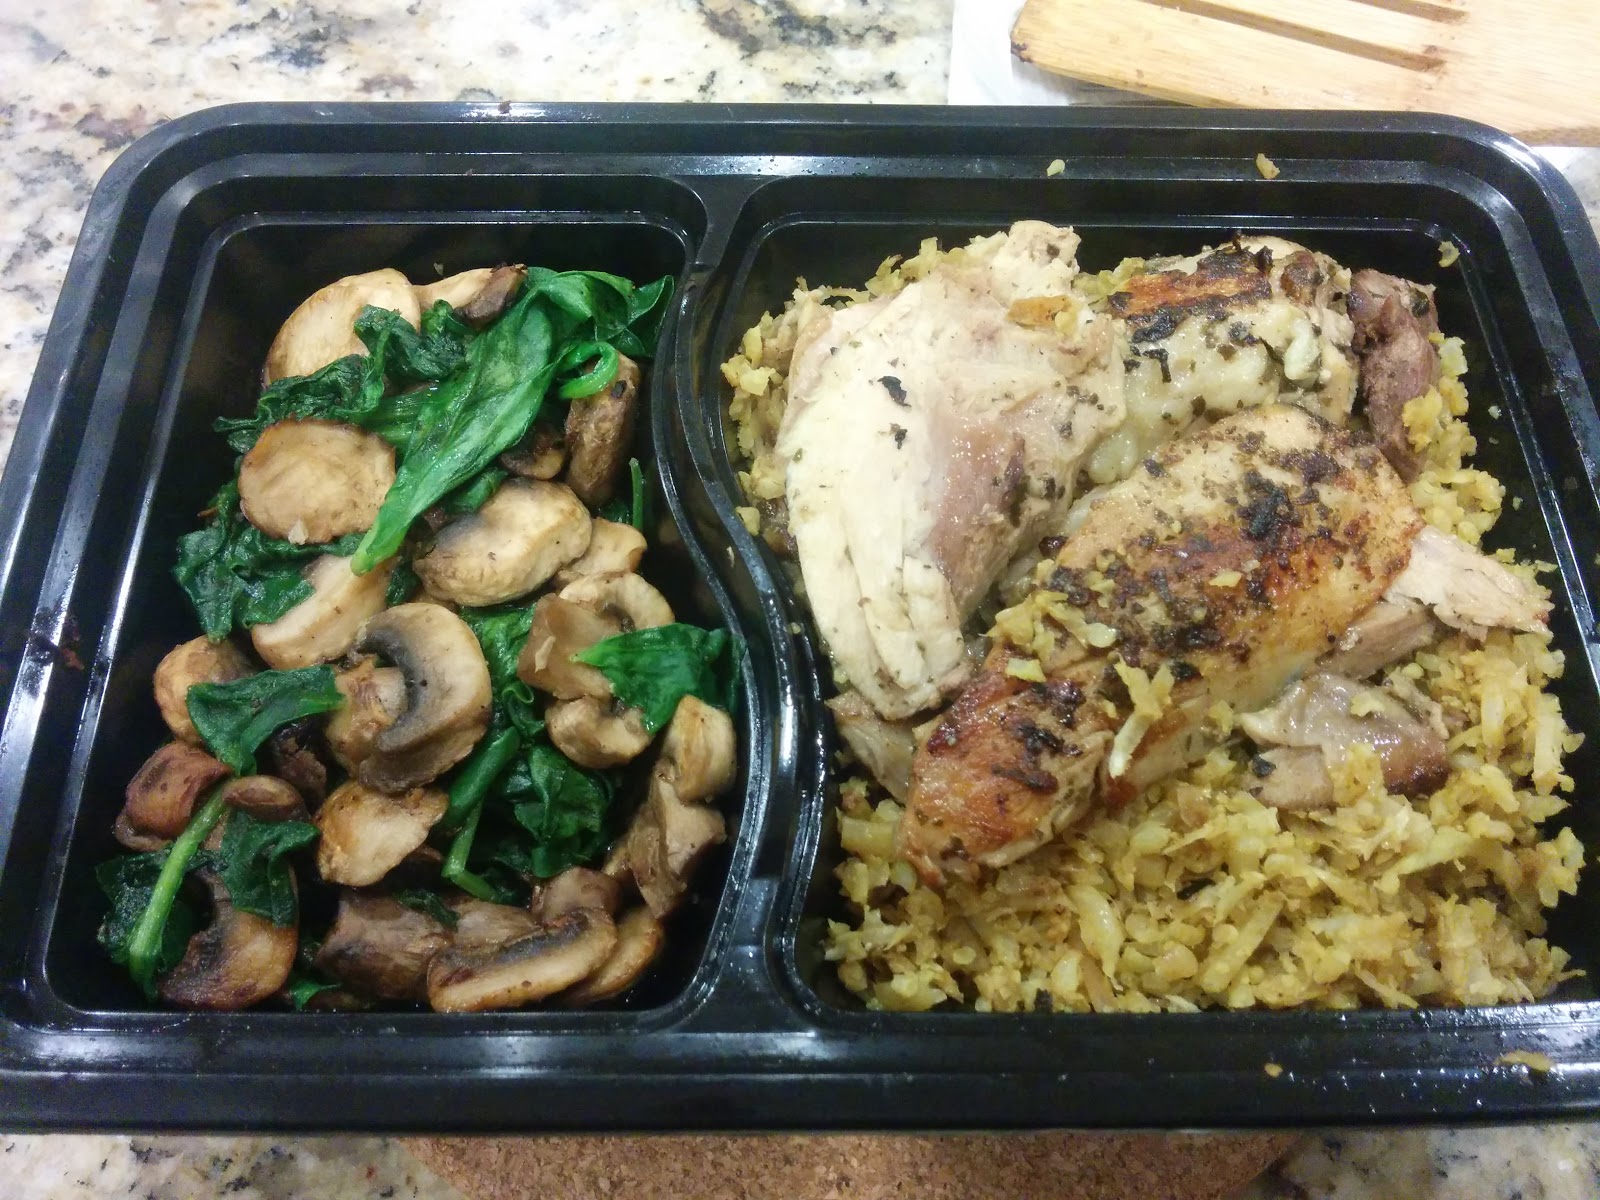
Cauliflower "Rice" - (a review)

This seems to be a Pinterest favorite among the low carb, no carb, paleo dieters. I've seen Cauliflower used as a substitute for both rice dishes and as a sub for mashed potatoes. The cauliflower puree as a mashed potato substitutes is great. With enough seasonings, you can't taste the flavor of the cauliflower and you get the texture of a creamy, almost runny, non-dairy potatoes. You're out of luck of you like your potatoes chunky or thick though. And there's no way you'd get the the complex texture from smashed red skin potatoes.

However... I've found that this cooking method makes cooking cauliflower SO MUCH FASTER and easier, And you get a really flavorful side dish there you won't miss the carbs (much). The calorie savings is pretty significant too. Approximately 25 cal (raw or steam cooked) per cup instead of 200 (white, steamed). Considering that you get about 2 cups of rice in your panda express meal... that's pretty damn significant.

So far, I've made a few dishes with the riced cauliflower.

Ginger Scallion Cauliflower

Curry Cauliflower, (under the chicken)


Cauliflower Fried "Rice"
(Pictured side by side with fried rice) 


If you have a sensitive pallet, you will definitely taste the cauliflower. I also noticed that you need to season pretty liberally - more than you would when cooking with rice. 

Will post actual recipes over the weekend. If you've used cauliflower as a rice or couscous substitute, let me know how you like it or what you do with it in the comments.  


Thursday, September 3, 2015

Stuffed Shells

One of the easiest one-pan make-ahead meals I make is hands down the stuffed shells. The ingredients for the filling generally can be kept on hand for a couple of weeks, making this a great option for that very last night before you have to go to the market. 

I was originally introduced to stuffed shells by KK, and was intimidated by making it at first since cooking the shells seemed daunting (how can I make sure to not break it?!). But it's almost as easy as making a pot sticker. 

Sorry, but we dug into it before I could get a "right out of the oven" picture. 


The shells and sauce: 

I use 2 (16 oz) jars of sauce and 1 package of jumbo shells. The larger the shell, the easier it is to work with.  Cook the shells according to package directions for the shortest time possible. You want to slightly undercook the pasta. When you bake it, the pasta will finish cooking and absorb moisture from the filling and sauce. 

Beef Filling: 

1 medium onion 
2 - 3 clove garlic
1 lb mozzarella, shredded
15 oz container fat free ricotta
onion powder (optional)
2 tsp salt
1 lb lean ground beef
shredded basil (optional)

Putting it together: 

  1. Cook the shells according to package directions for the shortest time possible. 
  2. Drain, then set aside on a cookie sheet to cool. In a frying pan, cook the onion, garlic, and ground beef. Drain and add the salt. 
  3. Lightly spray a 9x13 pan and an 8x8 pan with cooking spray. 
  4. Spread a thin layer of sauce on the bottom of the pan (skip if making ahead). 
  5. Combine the cooked meat mixture with the ricotta and half of the mozzarella until the mixture is smooth. 
  6. Spoon the filling into the shell. Each shell should hold about 2 - 3 tbsp of filling.
  7. Lay the filled shells into the pan, seam side down.   

When you're ready to cook it, pour the pasta sauce into the pan, making sure all of the shells are covered. Top with the remaining mozzarella. Bake at 350 degrees or until cheese is melted and sauce is bubbly, about 35 - 45 min. 

Tip: If you plan on making these ahead and want to freeze them, lay the stuffed shells in a pan lined with parchment paper. Make sure no two shells are touching. Once they are frozen, they will store well in a gallon ziplock or a freezer safe storage container. They can easily go from freezer to oven. Just increase the cooking time.

Vegetarian Filling: 

1 lb frozen chopped spinach
minced garlic
2 zucchini, shredded
1 lb mozzarella, shredded
1/2 cup grated parmesean cheese
15 oz container fat free ricotta
onion powder (optional)
2 tsp salt

Friday, June 19, 2015

Ginger Scallion Salmon

I think one of the easiest ways to cook salmon is to wrap it up in foil and stick it in the oven. You get a tender fish that's moist and flavorful. I like using light soy sauce as the poaching liquid and then finishing it with some ginger scallion oil. 


Ingredients: 

The fish:
6 oz filets
Fresh ginger root, peeled and sliced
Scallions; 1 stalk trimmed and halved per salmon fillet.
kosher salt
pepper

The sauce:
1/2 cup fancy dark soy sauce
freshly grated ginger
1/2 bunch chopped scallions (reserve 1/3 for topping)
1/2 c canola oil
2 tbsp oyster sauce


Directions: 

  1. Place a filet in the center of a piece of foil. 
  2. Sprinkle some kosher salt on the fish and top with pieces of ginger and lengths of scallion. 
  3. Drizzle about 1 tbsp of soy sauce over the fish, then wrap the foil into a loose pouch. There should be room in the pouch for the liquid to steam the fish.  
  4. Place in a 325° oven for 20 min. Meanwhile, make the sauce
  5. In bowl, place grated ginger, oyster sauce, soy sauce and chopped scallions. Mix ingredients together until the sauce is one consistency. 
  6. Heat oil in small pan until it's right above the smoking point, then quickly pour hot oil into bowl with the other sauce ingredients. Stir.
  7. Remove from oven and let stand 5 min. Remove fish from packets and plate over rice or beds of greens. 
  8. Spoon sauce over fish and top with scallions right before serving. 

Wednesday, June 17, 2015

Sweet Potato Greens with Chinese bacon

Sweet potato greens were one of those veggies that I took for granted as a kid. Since I've become an adult, I've noticed that I very rarely come across these veggies in a super market - mainstream OR the local Asian variety. Some Farmer's Markets may have them when they're in season. Or, if you are inclined to garden and are growing sweet potatoes, don't waste the greens! These, along with the lap yuk (chinese bacon), were supplied courtesy of my mom. The recipes itself is amazingly simple. When preparing the leaves from a garden (and maybe even if you bought it at the farmer's market), it's important to remove edible tender leaves and stalks from the main vine, peeling away some of the tougher bits the same way you'd de-vein pea pods.

The cooked leaves of the greens should be silky, similar to cooked spinach while the stalks gives you something substantial to chew on. I really like it with rice or as part of a dry noodle dish.


Ingredients: 

1 - 2 lb sweet potato greens,
1 portion of lap-yuk, diced
1 tsp sesame oil
1 clove garlic, minced
1 tbsp oyster sauce

Directions: 

  1. Blanch the greens, then set aside.
  2. Heat a large fry or saute pan
  3. Place sesame oil and bacon in the pan, rendering out some of the bacon fat. Add garlic. 
  4. Once the garlic has a golden brown color, add the blanched greens. 
  5. Mix and saute until ingredients are combined. Cover for 1 min. 
  6. Remove from heat and lightly toss with oyster sauce.  


Tuesday, April 7, 2015

Leg of Lamb

This is a really simple recipe that can be used for any cut of lamb. I originally used this for rack of lamb, but decided to do a leg this time since I was cooking for 6 people. This 4.5 lb roast could serve up to 24. I use a very similar process when I'm making a beef roast as well.

When purchasing large chunks of meat, I'm finding that the larger non-pretty shaped meats are now wrapping in this elastic netting. I'm sure it's perfectly fine to cook the meat with the netting (and it's meant for that) but I prefer working with the meat a bit before putting it in the oven. 

Ingredients: 

4 - 6lb boneless leg of lamb
1 - 2 tbsp of olive oil
5 cloves Garlic
4 tbsp fresh Rosemary, finely minced, 2 x 4"sprigs whole 
1/4 tsp Thyme
1/4 tsp rubbed Sage
2 tbsp Kosher Salt
Pepper

Process: 

  • Pre-heat oven to 325
  • Remove meat from packaging (including the netting if it's in one). 
  • Trim any large amounts of fat and lightly score the surface of the "skin" on the leg
  • lightly drizzle olive oil over the meat and rub it in, concentrating on the scored surface of the skin. 
  • sprinkle a generous pinch of salt over surfaces, including the interior hole from where the bone was removed. Rub in. 
  • rub in garlic and herbs, covering the surfaces of the meat and in the bone cavity. add a little more oil if necessary. Place one of the whole sprigs in the bone cavity
  • (optional) tie the meat up in twine so that it will retain a good shape for carving
  • place 2nd sprig in center of the roasting pan, 
  • in a skillet or griddle, sear the meat, making sure to cover as much of the surfaces as possible. then place the meat in your roasting pan, skin side up
  • place in oven until meat internal temperature is 145 - 155 (see cooking times reference below)
  • remove from roasting pan, tent with some foil, and let rest 15 - 30 min before carving

132 cal per 3oz serving


Served with a helping of ratatouille, sauteed snap peas, roasted veggies and mushrooms, and a side of stuffed shells. If you like mint sauce with your lamb, try it with this lemon mint chimichurri instead of the canned stuff. 


Tips:

  • Use a roasting pan. The fat and juices from the roast will drip away. If you're cooking it skin/fat side up, then you'll have a beautifully moist roast without it sitting in fat. 
  • Let the meat sit in the fridge for a couple of hours after you've seasoned it. It'll get more flavorful. 
  • Try not to peek in on it too often. Every time you open the oven, the oven temperature drops and it'll take more time to bringing up to the cooking temperature again. 
  • Roast your veggies after taking the meat out of the oven. By the time the veggies are done, the roast will be perfectly rested and ready to be carved. 

Lemon Mint Chimicurri

Chimichurri is ridiculously delicious and easy to make. At it's core, it's finely-chopped parsley, minced garlic, oil, oregano, and vinegar - not unlike other other forms of pesto. I first had it as a condiment for grilled beef at an Argentinian restaurant. I was re-introduced to it at CPK where they have a delicious under 500 cal grilled chicken served with chimichurri and at Marmalade Cafe in a grilled flank steak entree. So why not on a roast lamb? 

I made it passover friendly, replacing all of the vinegar with lemon juice. And while the parsley, oregano, red chili pepper herb combination is delicious, I thought it might be a little too overpowering for the lamb. Since I know mint goes really well with lamb, I decided to make that the more prominent herb in this chimichurri. 


Ingredients: 

1 whole lemon - zest and juice
1 bunch of mint (about 1/4 cup finely minced
4 cloves garlic, finely minced
1/4 c finely minced parsley
ev olive oil
1 tsp of honey


Directions: 

In a food processor, pulse to combine lemon zest, lemon juice, garlic, chopped mint, and parsley. Add oil and pulse/mix until desired consistency. Add the honey and mix for 3 seconds. Use as a sauce for the meat and/or a marinade. 

Tuesday, February 10, 2015

Aioli & Mayonnaise

One of my friends is doing this insane healthy diet challenge where she's not allowed to eat anything with added sugar. It's super easy to check - just see the ingredients list. That's when you realize that sugar (and salt!) is added to EVERYTHING.

So... solution... make it yourself!

I have to say, I'm really proud of how it came out. I'm normally not a fan of mayo. But I definitely liked this! It's a simple 4-ingredient recipe: oil, egg yolk, vinegar, water. I omitted both the salt and the sugar. Fun fact: an aioli is just mayonnaise with garlic in it.


Ingredients: 

1 cup oil (I did 1/2 safflower; 1/2 ev olive)
1 egg yolk
1 tbsp white wine vinegar
1 tbsp water
5 cloves of minced garlic (omit for plain mayonnaise)

Method: 

Put the egg, vinegar, water, and garlic into a food processor (or blender). Make sure the processor has some way for you to add things into the work bowl while it's turned on. Pulse for a few seconds and then set it for ON. 


While the processor or blender is on, drizzle your oil into the work bowl in a slow, steady stream. Note: the stream should be about 1/4"  - or about half the thickness of a pencil. 


Once all of the oil is incorporated, stop and scrape down the sides of your work bowl. Then, let it run again for another 10 to 15 seconds. You'll have a super creamy and thick product. 


Transfer into your preferred storage container. Makes a little over 1 cup. 


Thursday, January 22, 2015

Roast beef

One of the easiest, but most intimidating things to cook is a large roasted hunk of meat. But the payoff is worth it as the leftovers are delicious in salads and sandwiches. Things to cook in the same oven as the roast - roasted green beans (or other roast-able veggie), some ratatouille, or baked potato/sweet potato/yam (all of which is comprised on my plate pictured below).

The plate is at least 50% veggie! #Eatinghealthy

Mmmm. The ratatouille is the non-pretty one, but still delish!

Ingredients: 

4 - 6 lb cut of meat for roasting (Top round, tri-tip, eye round, loin, etc)
4 to 6 cloves of garlic, minced about 1 clove per pound, but feel free to use more
2 tbsp of kosher salt
fresh cracked pepper
2 tbsp extra virgin olive oil

Mixture of the following herbs/spices (or whatever premixed spice/herb mix you like)
1/4 tsp rubbed sage
1/4 tsp rubbed thyme
1 tbsp parsley flakes
1 tbsp dried basil
1 tbsp onion powder
quantities can be adjusted according to your taste

4 lb roast serves 8 - 12.
1 12-person portion is about 235 calories, according to MFP's recipe builder. 

Instructions: 

Preheat oven to 325. 

With paper towels, dry the surface of the meat thoroughly. Rub 1 - 2 tsp of olive oil over the meat. liberally sprinkle the salt over the entire surface of the meat.  Rub the garlic over the meat, getting into any folds. If you want, pierce the meat all over with a knife and insert piece of garlic into the slits. Apply a second coat of oil (another 1 - 2 tsp) and liberally sprinkle on or rub on the herb/spice mix. 

Heat a pan and coat with a small amount of PAM or about 1 tsp of olive oil. 

Put the roast in the pan; sear it on all sides to get some nice browning. I used some tongs to hold it up to the sides of it would sear too (2-3 minutes each surface, about 10 min total). I would have tied it with twine before this step if I had some on hand. 

Place the seared roast in a roasting pan (preferably with a rack) and cook at 325° until the internal temperature is at the desired doneness. This was 1 hr 45 min for a rare/medium rare (internal temp 140° - 145°). Remove from oven when the temperature is about 5° under your desired temperature. It will continue to cook as it stands. 

Loosely tent the roast with tin foil so that it retains more of the heat as it rests. Let rest for 10 - 15 min. (The larger the roast, the longer you'd want to let it rest. I generally do 5 min + 1 - 2 min/lb)
The roast at the very center. 

Notes:  This resting period allows the meat to finish cooking and the juices get redistributed as it cools. If you cut into it too soon, even to check for doneness, you'll end up with a dry, tough hunk of meat with the juices running all over your carving board/plate/whatever. 

If you're using a different cut of meat, check out this chart as a guide for cook temperature and times based on the kind of meat you have - http://www.recipetips.com/kitchen-tips/t--1542/roast-beef-cook-time.asp

Wednesday, January 21, 2015

Oatmeal redux

Oatmeal has been touted as a great, healthy food. Heart healthy, full of whole grain goodness, good for cholesterol, etc, etc. It's also really handy as there are a lot of instant varieties so it's the ultimate of quick breakfasts. 

There's only one problem... most of the instants and most oatmeal topping options out there is one flavor of sugar or another. But then, I stumbled on this concept online - savory oatmeal! Of course! Why didn't I think of this before!? The concept is not entirely new. Chinese congee - a rice porridge (made super thick or thin to whatever your tastes) is all savory, topped with dried meat, fish, condiments like salted duck eggs or "thousand year" preserved eggs - the possibilities are vast.  Now, I'm not suggesting using the same congee toppings I'd just mentioned in oatmeal. I don't think they would lend well to the flavor of oats. That being said, there's nothing wrong with experimenting. 

My first savory oatmeal topping combo - sunny side up egg, warmed up sliced turkey breast, scallions, and a touch of soy sauce. It was delish. Next time, I'm going with an over easy or poached egg to get more runny yolk goodness to mix in with the oatmeal. The yolk gives it a really nice creamy consistency and the scallions brightens it up. 


Friday, January 16, 2015

Ratatouille

Ratatouille with Chicken and brussels sprouts
I was never really a fan of eggplant when I was a kid. The way my mom prepared it (in a very
traditional chinese way, stuffing it with a fish paste - the fish equivalent of ground meat - and then pan frying it) just didn't do it for me. It was oily and slimy and just ew.

But then, I learned that eggplant is not just eggplant. It's really how you cook it and what you cook it with. It really does take on the flavors of what you cook it with. Which is probably why I like the eggplant heavy ratatouille. It absorbs the flavors of the aromatics and with the other ingredients, has a great texture. The zucchini, squash, and mushrooms (if using a meatier variety one like shitake or portabello) gives it a really nice texture - a chewiness that's not gummy.

The only issue I have with this recipe is that there's no real way to make just a little bit.... and I'm the only one in my household that likes the primary ingredients in it.

Ingredients: 

  • 1 medium to large eggplant (peeled, sliced the firm narrower neck part and cut into 1/2 inch cubes the bulging bulb part). 
  • 5 medium tomatoes (4 sliced, 1 diced)
  • 4 zucchini (3 sliced on a diagonal, 1 diced)
  • 1 medium yellow squash (sliced on a diagonal)
  • 2 cups of mushrooms, roughly cut (I use shitake or portabello)
  • 1 bunch fresh basil, cut into thin strips
  • 5 cloves of garlic, minced. 
  • 1 small onion, diced
  • Olive oil
  • salt (kosher preferred) and pepper

Optional: If you're not concerned with it looking pretty, just cut everything into chunks (dice).  This is the more authentic "rustic" version of the dish.  Also, you can vary the herbs used. This dish traditionally uses herbs de provence. Also, it some recipes call for tomato sauce at the base of the dish, but I wanted something that was a little more delicate. 

Instructions: 


Toss 2/3 of the basil, the minced garlic, and 3/4 of the onion with the other diced ingredients in a bowl with about 1 tbsp of olive oil and a liberal amount of salt. Spread it into the bottom of the pan. 


Layer the sliced zucchini, tomatoes, and eggplant on top, occasionally tucking the remaining basil between the layering pieces. This will pretty much fill the pan up to the brim... if not a little over. Don't worry about over-filling the pan, the ingredients will actually cook down in the oven. 
Drizzle some olive oil on top and a generous sprinkling of salt and crushed black pepper. 


Bake in a 350° oven for 35 - 45 min. Contents will be hot and bubbly, but the top should be on the drier side. Optional: Sprinkle on some grated parmesan cheese when serving. 

Note: the eggplant and tomatoes will cook down and release a lot of moisture. DO NOT add any liquid to this dish if you want it to have that nice thick stew consistency. The only exception would be to add a thin layer of tomato sauce between the diced veggies and the layer of sliced ones. 

Got leftovers? Not a problem! This dish actually tastes better after the individual flavors get a chance to mingle with each other. :) 

Serves: 12
Cal per Serving: 75


Wednesday, January 14, 2015

Beef & Mushroom Stuffed Tomatoes, Zucchini on spinach with peas

These savory stuffed tomatoes and zucchini are the center pieces of a warm spinach salad. A touch of pesto and an over easy egg (fried on a non-stick skillet with a spray of PAM) served as the dressing (there's just something really satisfying with a runny yolk). I added lightly sauteed snap peas to the salad for the "crunch" factor (instead of croutons).  

Plate as pictured: 388 cal


Ingredients: 

1 lb 90% lean ground beef
1 onion, diced
2 cups chopped mushrooms (cut as fine as you'd like)
1tsp olive oil
Dash of soy sauce
1 tsp garlic powder or 2 cloves minced garlic
4 medium tomatoes
1 zucchini, cut lengthwise
Salt and Pepper to taste

Using a paring knife, core the tomatoes; scoop out the gooey insides with a melon baller or spoon.
Cut the zucchini lengthwise and scoop out the fleshy center where the seeds are (if you want smaller zucchini pieces, cut in half across as well). Make sure to leave some of the seedy flesh at the ends so that you're making a zucchini boat for the filling.  Set aside.

In a large skillet, brown the onions with the olive oil. When they begin to caramelize and turn translucent, add the mushrooms, garlic, and soy sauce. As the mushrooms cook down, season your ground beef with salt and pepper. Then, add the meat to the pan to brown throughly. Since this is 90% lean beef, there will be little need to drain the meat afterward.  Once the meat is cooked through, remove from heat. Spoon the meat-mushroom mixture into the tomatoes and zucchini.

Note: You will have quite a bit of filling left over. There's enough filling for 12 - 16 small/medium tomatoes. The ones pictured here are tennis ball sized tomatoes. 

Arrange in a baking dish. Bake in a 375° oven for 12 - 15 minutes. The tomatoes will be soft at this point and the zucchini still al dente.

If you're not a fan of either tomatoes or zucchini, or would rather have more meat in the meat-to-veggie ratio, consider stuffing bell peppers or using the filling in lettuce cups.

Each stuffed tomato is about 75 cal.
Each zucchini quarter is about 90 cal.

Tuesday, January 13, 2015

Guest Post: Muffin Tin Egg Beaters


I needed a breakfast that I could prepare and save for those mornings when I need to hustle out the door, something that wasn't a prepared frozen meal or worse, fast food.  I've made these twice now, and have improved the original idea a bit.   Made with Egg Beaters, these muffins are low in calorie, fat and carbs, but are high in protein.  Great for squeezing those veggies into your breakfast.


Ingredients:

16 oz of Egg Beaters (100 calories, 20 g protein)
Everything else can be swapped depending on personal taste
2 TB Hormel Bacon Bits (50 calories, 6 g protein)
One Green onion, chopped
1 C Spinach, chopped
1 oz Shredded Cheddar Cheese (114 calories, 7 g protein)


Instructions:

  PreHeat Oven to 350 degrees.  Stir ingredients together in large bowl.  Spoon ingredients into silicon muffin cups, no more than half full.  They will rise, and then shrink again as they cool.  Cook for 20 minutes, until no longer liquid.  Refrigerate in sealed container until ready to eat.  Microwave for 25 seconds for two muffins.

Notes:
The eggs are liquid and will therefore soak through and weaken paper muffin cups, leaving dye on the eggs and tearing constantly when trying to peel from the muffin.  It was worse than trying to peel a navel orange.  Tin Foil leaked and also can't be put in the microwave.  However, I don't recommend putting directly into the muffin tin because the egg will stick.

Nutrition:
All 9 Muffins:
264 calories, 33 g protein
Suggested serving size: 3 muffins
88 calories, 11 g protein


Guest Post by kit.to.the.kat

Shiritaki Noodles (a review)

I'd heard about this stuff a few times in the past few years. Hungry Girl raves about them and has slew of recipes that feature these noodles. I'd seen a few articles and it seems like a lot of people either love it or hate it, but there's not much in between. It really boils down to what you're expecting form it.

What: 
Noodles traditionally made from a japanese yam. Yam-tofu blend versions of this exist in many US supermarkets.

Why: 
4oz = 15 calories. Low carb, gluten free, etc etc. It's being touted as the miracle pasta swap.  The noodles pictured here is 30 calories worth of the "spaghetti" noodles.

First Impression: 
Meh. I found them awkward to handle and they didn't react as I'd expect the noodles to. This expectation stemmed from the marketing as being a "pasta swap." This is fairly unrealistic if you're into textures and mouth-feels of foods. In that aspect, it is NOTHING like italian egg-and-semolina flour pasta. However, they are super similar in texture to Maifun and Saifun noodles found in Chinese cooking.

I rinsed them well and strained it as instructed, but they were still too wet when I went to doctor it up in the pan. The pesto doesn't "stick" to the noodles (nor would I expect any other similar sauce). I also made the mistake of adding a touch of water to the pan when cooking so there was a little too much liquid. Will keep this in mind for next time.

The Good: 
If you're used to any kind of asian glass noodle, then this is very similar to that. The texture is bouncy and I'm used to that kind of texture in a much thinner noodles. The noodles have a very neutral flavor, so it will take on whatever flavor it's cooked with. Because of the slipperiness of the noodles, I would use a little bit of a super flavorful sauce or try it as a noodle for soup in the future.

It was also very filling and I didn't get hungry for a late night snack or dessert. It's rich in fiber, apparently. A quick look online shows that a lot of people who are watching their blood sugar loves this stuff because it keeps their blood sugars in a good range and minimizes the spikes.  Usually found in asian markets, more brands are marketing it in US stores. I've seen them at Ralph's and Vons (albeit with different brand names) in the section where you'd find the tofu.

The Bad: 
It's weird to handle at first. The liquid that it is packaged in has a pungent odor, so rinsing, rinsing again, parboiling, and drying very thoroughly is a MUST when preparing the product. Also, you can't add "just a bit" of liquid as these noodles are slippery when wet and doesn't absorb the liquids it's cooked in.

The texture, if unexpected, could be off putting to some. Rather than a soft, al dente chew like you'd expect from pasta, these are slippery, bouncy, with a hint of a crunch.

The Verdict: 
I'm definitely going to try to incorporate it into my diet. I think I'll try it in some more traditional japanese recipes and experiment with my own.

Wednesday, November 5, 2014

Beef Stew

Ingredients:
2 lb chuck roast
2 cups diced celery (pea sized chunks)
2 cups diced carrot (pea sized chunks)
6 cups beef broth (or water + bouillon)
1 medium to large onion, diced
1 - 2 potatoes cut into 1" cubes
1 package frozen peas
1 package white mushrooms, diced
2 tbsp Worcestershire sauce
4 cloves garlic (or generous sprinkling of garlic powder)
1 can diced tomatoes
2 tbsp of tomato paste
Salt and Pepper
Rosemary, basil and other herbs to taste (if you don't want to have specks of herbs floating in the stew, you can put the herbs in a large ball-type tea strainer so you can pull it out after cooking)
about 2 tbsp of oil

Directions:

  1. Trim excess fat off the meat. Cut into 1" cubes. Blot on paper towels to dry
  2. Toss with toss with about 2 tbsp of kosher salt and 1 tbsp of black pepper
  3. In a well oiled (or PAMed) skillet, brown the meat in batches, transferring the browned meat into a 6 qt pot. 
  4. Add a little more oil (if necessary) to the skillet, the caramelize the onions. The moisture from the cooking onions should help deglaze the pan of the bits from browning of the meat. Once the onions are golden and translucent, add the garlic and tomato paste and cook for 2-3 minutes. If you need to, add a 1 -2 tsp of water or broth the loosen the paste and help further deglaze the pan. Transfer into your pot. 
  5. Saute your celery until it turns a bright green, then transfer to the pot.
  6. Brown your mushrooms with a pinch of salt. transfer to the pot
  7. Add the canned tomatoes, worcestershire sauce, beef broth, your optional spices and a generous dash of salt to the pot, gently stirring the ingredients together. 
  8. Bring to a boil, then reduce to medium. Cook uncovered for 30 minutes. 
  9. Add your potatoes and carrots, cover, and cook for 30 minutes. Test the potatoes for doneness. They should be fork tender or a little firm. 
  10. Reduce to a simmer (or transfer to crock-pot set to low) for 2 hours. (OK to simmer for longer. Just watch it so there is enough liquid in the pot to keep it cooking and not burning). 
  11. Add the frozen peas and let simmer for another 10 - 15 minutes. (The low cooking time for the peas keep them a bright, vibrant green. It's totally OK to put them in before the 2-hr simmer time.)
  12. If you'd transferred the stew to a Crock-pot, reduce the heat setting to warm. 
To thicken the stew: 
Option 1: Coat the meat in flour before browning.  Add 1 tbsp of flour and tbsp of oil to the caramelizing onions to create a roux. 
Option 2: Make a slurry with 1/4 c corn or potato starch and 1/4 c water. Add the slurry to the stew between steps 9 and 10.

Crockpot only version: 
Reduce cooking liquid by 50%
layer ingredients w/ root veggies on the bottom. 
Increase cooking time to 6 hr on high, 12 hr on low. 

Tip: Beef broth vs Beef bouillon - the bouillon has a lot of salt in it, so adjust the amount of salt in the rest of the recipe to taste.